Monday, July 28, 2014

Vintage Princess Tea Party

Planning Isabella's 6th birthday was a blast! It all started when I was in the workroom at the High School that pays my bills. At the center of the workroom sits a coffee table which at the time was covered in used large tri-fold cardboard posters with a "FREE" sign on it. I immediately envisioned a golden tiara/crown for a dessert table backdrop. So from that piece of cardboard that a student once used for a project on becoming an Aviation Pilot, I decided to take it home. From there, this party began to pretty much plan itself.  

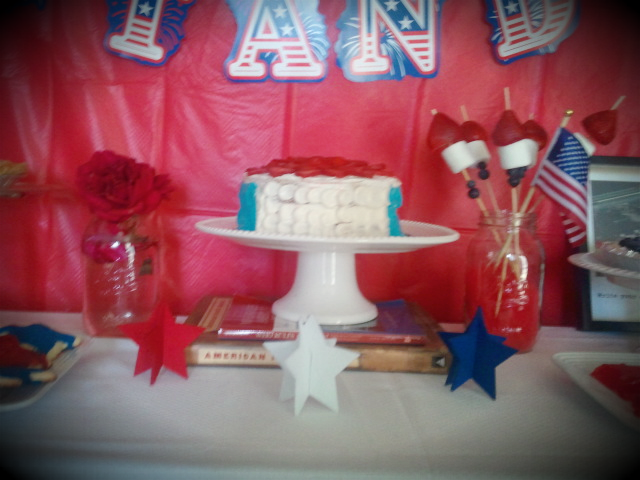
For my crown backdrop: I carefully drew my version of a crown and cut it with a box cutter. I then had my husband paint it in gold (purchased the gold paint with 40% coupon at Michaels). I used gems to adorn each peak of the crown and gold glitter to outline the entire thing. The entire project was less than $10 dollars to make. The banner was a separate purchase from Etsy.  

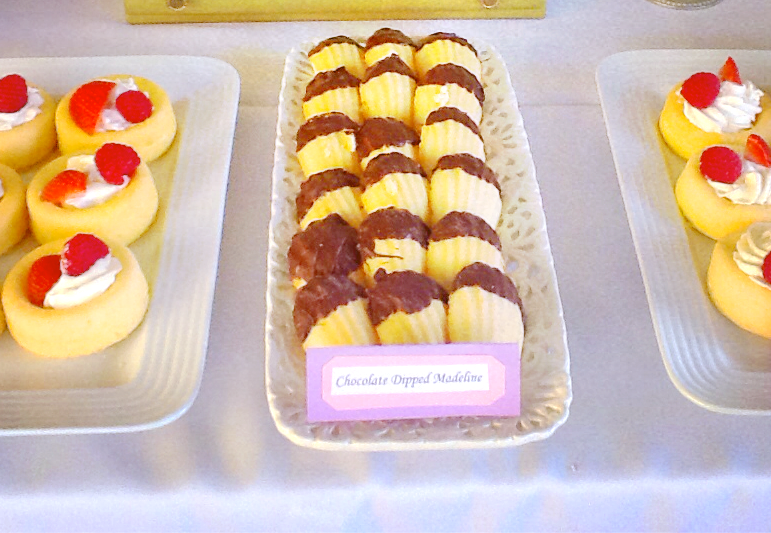
Dessert Table: I made Fruit Tarts, Chocolate dipped marshmallows with sprinkles, vanilla cupcakes, coconut macaroons and purchased a pastry assortment from Costco. 


The baggies were a total of $3 dollars. Purchased the ribbon, the doilies and the brown paper bags at the Dollar Tree.

I just love everything about this picture!!! Somewhere along the party planning way, the princess party   became a princess tea party. I had so much fun perusing the Salvation Army, Goodwill, and Swapmeet for my tea cups. I kept finding the most beautiful vintage pieces. 


Cucumber sandwiches, anyone?

I ordered a kids table with kids chairs for their sweet tea party.

With the leftover gems that I used for the crown backdrop, I decided to make princess/prince hats for the kids. I used all pink card-stock and one tan colored card-stock (which I was lucky enough to already have in my craft-box), rolled it up, stapled it and hole punched it for gold satin ribbon. I used the gems for embellishment and glitter to write each princess/prince's initial. 

Kids food menu included, pb&j, veggie cups, mac & cheese, pigs in blanket and cucumber sandwiches.


My centerpieces for the Queens (the moms) table is a funny story. I actually baked mini cakes with ruffled frosting for centerpieces. My mini cakes were supposed to sit on the gold candle holder with the glued round mirror (as pictured above) which were purchased (separately) at the Dollar Tree and spray painted and assembled. Anyway, the morning of the party, as I rushed to get the party set up, my mini cakes smashed into one another and were a complete mess. I was beyond upset. I think I cried a little. LESSON LEARNED. Luckily, my lovely sister, Maria, and my very patient friend, Azumi, had the brilliant idea of using the teapots as vases. So that is how I ended up with these beautiful centerpieces.


The kids loved this box. It had tiaras, boas, rings, knight gear, kid friendly nail polish (with parental permission, my older nieces painted nails) etc. 


My brilliant sister Maria thought it would be a great idea for the little ones to see a "real" looking princess. So while my oldest niece drove to the nearby Dollar Tree and picked up a few toys, my other niece put on her Quincenera (Sweet 15) dress with a tiara. At the top of the hour, following the sound of the trumpet, the double doors opened and out came a "real" princess bearing gifts for all the children. The kids were in AWE, to say the least. (I wish I had taken a better picture of the moment they saw her and of their little faces....it was priceless!)

My photo backdrop consisted of a pink table cloth and paper fans from Oriental Trading. Love those paper fans!

Happy 6th Birthday to my beautiful Princess!

Sunday, June 8, 2014

Sweet 15 SweetsTable

So  this sweets table was for my darling niece's 15th birthday. She loves anything sweet so it was a fun table to make. Some treats were store bought while others were homemade. 


For the yummy no-bake cheesecake bites in a shot glass, I followed Madigan Made 's tutorial. Not only were they simple and inexpensive to make but they were a huge hit at the party!
The yummy organic Guava concoction was made by my beautiful momma. She had extra Guavas and decided to make use of them for the event. 


Although I LOVE cakepops, the marshmallow pops are easier to make (plus I was running out of time). The marshmallows were dipped in dark chocolate (which I purchased at a local store) and then dipped in either coconut flakes, graham cracker crumbs, walnuts, or a mixture of all three. 


Well these aren't exactly fruit tarts...but when I was making the labels for them I had a brain fart and couldn't remember the proper name. I still don't. But, nonetheless, they had fruit in them. Strawberries and raspberries to be exact. The sponge cakes were purchased at Fresh and Easy and I followed bannerboutique's super easy frosting/filling. All you need for it is cool whip and an 8 oz. bar of cream cheese, mix together and VIOLA!


My wonderful sister had the genius idea of ordering her three layered frosted cake from Northgate (at half the price that any other baker would have charged....$40). She picked up ribbon and the lavender edible roses from another local grocery store ($8) and just assembled it to her liking. The entire project was less than $50. Isn't it fabulous?


I have to stop and mention how cool the pretzel stands look! My wonderful friends at MKR let me borrow the stands for this event. I love how the chocolate covered pretzels hang. 

My homemade vanilla cupcakes and wrappers were fun to make. The paper for the wrappers were purchased at Michaels (used the same paper for my "Sweet Madeline" banner) and hand cut each and every cupcake holder (I googled a sample online and used it as a guide) and used glue stick to hold it together. 


Happy Birthday my Sweet Madeline!

Friday, June 6, 2014

Kindergarten Graduation Edible Oreo Lei

These super easy edible leis are perfect for a kindergarten graduation! Instead of making the graduate's personal favorite freshly baked cookies (Edible Cookie Lei), I opted for something less time consuming. I decided to go with Oreos, although really any type of cookies will do.
*If you decide to make chocolate chip  leis make sure to keep it in a cool place...nobody wants a melted lei.

All you need: saran wrap, cookies, ribbon and a graduate. 


Cut the saran wrap as long as you need for your graduate (I cut enough for 12 cookies)


Fold over


Fold the other side until its nice and tight. 


Start twisting


I chose two different ribbons. I used this silver one to hold it tight.


The lavender ribbon was used for decorative purpose..


Tie the ends together with the leftover ribbon. 

Congratulations to my little love. 

Tuesday, June 3, 2014

Fourth of July Sweets

The smell of Hawaiian Tropics, BBQ, grilled corn and salty margaritas is a personal indication that Fourth of July is around the corner. So, I decided to share with you last year's simple but sweet dessert table that I put together for my kids, family and friends. Enjoy. 

 These patriotic skewers were a huge hit with the kids. Bamboo skewers were purchased at the Dollar store, marshmallows at local Target, strawberries and blueberries at Sprouts. This inexpensive and yummy project was simple to assemble. 
I decided to bake my  Busy Momma Cheesecake and embellish it with blueberries and strawberries for the whole patriotic effect. 
I looked through my books/old college textbooks for "American-like" books to use for decor and stand for my cake. I made a white cake with strawberry filling and a cream cheese frosting. I followed Bird On A Cake tutorial for my frosting. 

Please excuse the blurry picture. The cherry pie was store bought and the homemade American cookies were baked and decorated by my little bakers: Isabella and Olivia. 

The red table-cloth backdrop, banner and the felt red, white and blue stars were purchased at the dollar store. $3 dollars to provide this decorative  look...

Margaritas in Mason Jars?? YES, please! 

Have a Happy AND Safe Fourth of July!! 

Thursday, May 8, 2014

The Roaring 20's / Great Gatsby Inspired 30th Birthday


So I had just finished reading the Great Gatsby before my 30th birthday and I instantly fell in love with the era. So as a goodbye to my Roaring Twenties (and as I entered my own great depression of becoming 30) I decided to make this my theme. My beautiful invites were made by my wonderful friend Roxy from MKR


I used cardboard (that I up-cycled from a box) painted it black with my little acrylic paint and printed black and white photos of my life. A good friend of  mine made my cupcakes, while I made the mini cheesecakes in a cup and the chocolate dipped strawberries. The cookies were store bought and the cake was a custom order. 

My fabulous flapper cake was not only fabulous but also delicious . My sweet friend and baker Cyntia. created a pistachio white cake, with raspberry filling and white chocolate frosting. 
My DIY bar was my favorite. I made my personalized Speakeasy sign with cardboard, black and white acrylic paint. 
I decided to personalize my drink menu with parts of my name for fun. To keep costs low, I decided on champange, mojitos and sangria. My DIY sign was made out of Dollar Tree items (pearls, frame) and computer paper. 


After perusing the Salvation Army on their 40% off day, I came across the candle holders ($7 for the set of 10). Because Mason Jars were used for moonshine in the 1920's , I found them appropriate to use as my vases. I found the silver trays at the Dollar Store as well as the faux pearls. I decided on pearls as they remind me of flappers.
I got really lucky with the black lace. My mom had an entire roll in her garage. As for the flowers, red carnations were my top choice as they are not only red and vibrant but cost effective. 


My DIY PhotoBooth was done with items that I had around the house. I already had the two Chiavari chairs which I purchased at the Swapmeet for $2 dollars each. I found my vintage table at my sister's garage sale. My backdrop (which is my personal favorite piece) was purchased at the fabric store for $2 a yard (I only used a yard and a half). My props were all handmade. I did not want to spend 8 dollars at Oriental Trading plus shipping. So instead I used black card stock, found a free template online, bought glue dots and skewer sticks (Dollar Tree). Viola! Instant DIY props for less than five dollars. 

The feathered, sequined headbands were also a DIY project. I bought about 2yds at the fabric store, feathers at Michaels (with a 40% coupon) and used my glue gun. I made a few of these in the event that guests didn't dress up. 

Dollar Tree frame. Can you tell I'm obsessed with the Dollar Tree? 

Although my food table doesn't look very fancy I decided to share it with you. To keep costs low, I purchased frozen lasagnas from Costco, baked them and served them. I also purchased the bread rolls and salads from Costco. My sister made a big pot of spaghetti while my mom made a pot of shrimp fettuccine.  The food costs were under $150 for 50 guests. Not bad, for being on a budget, huh?!

So I was running out of time and I had forgotten to order my long cigarette to accessorize my outfit. So I went to Party City and bought a pack of  fake (but look super real) cigarettes. I used a pencil and painted it black (with acrylic paint) and used silver tape to hold my piece together.  

I had my husband spray paint a cardboard box black (Spray paint was the cheap one from Walmart, less than $3). He cut a small rectangle for a peephole. I was trying to go with the whole SpeakEasy vibe upon entering the party. 

I loved that (without planning on it) all my guests wore black or red and I was the only one in white!

As for my dress, I found it at Ross for $16.99. I made my own headpiece with an old scarf, gold ribbon and feather from Michaels and an old vintage brooch.  

I honestly couldn't of pulled this event off without the wonderful help of my family and friends. I am one blessed, 30 year old , gal.